Hedge Trimming Time

Today we trimmed the Cupressocyparis leylandii hedge that runs along the front of our garden, so it seems timely to write a few notes about hedge trimming.

A well maintained hedge is a smart looking boundary, and provides both privacy for humans and shelter for wildlife.  A neglected hedge can inhibit access, cause problems with the neighbours, excessive shade etc..  So best to keep it trimmed and tidy.

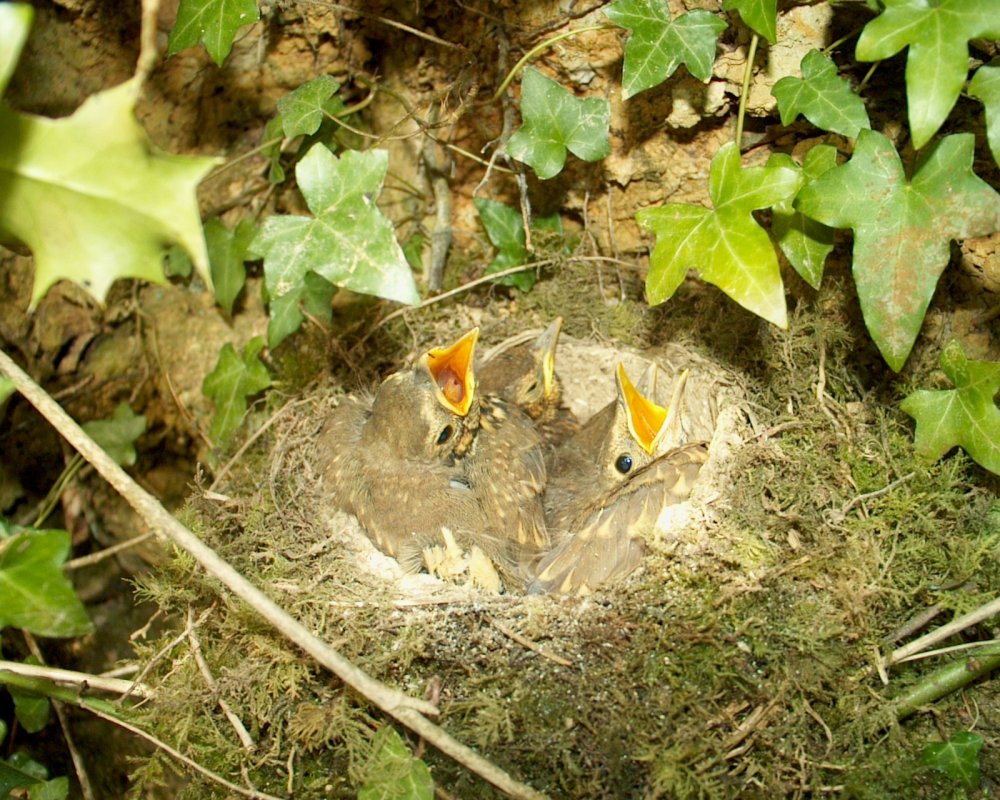
Song Thrush Nest (photo: Rob Wolton www.hedgelink.org.uk)

There’s lots of advice on the RHS website about when to trim different hedge species, but I personally think the RHS place too much emphasis on pruning in summer.  The period from March to August is the main nesting period for many garden birds and, at least in England & Wales, it is an offence under Section 1 of the 1981 Wildlife and Countryside Act to intentionally damage or destroy the nest of any wild bird while it is in use or being built. A bit of subtle snipping in summer, maybe, but in my view the main pruning should generally be done between now and the end of February.

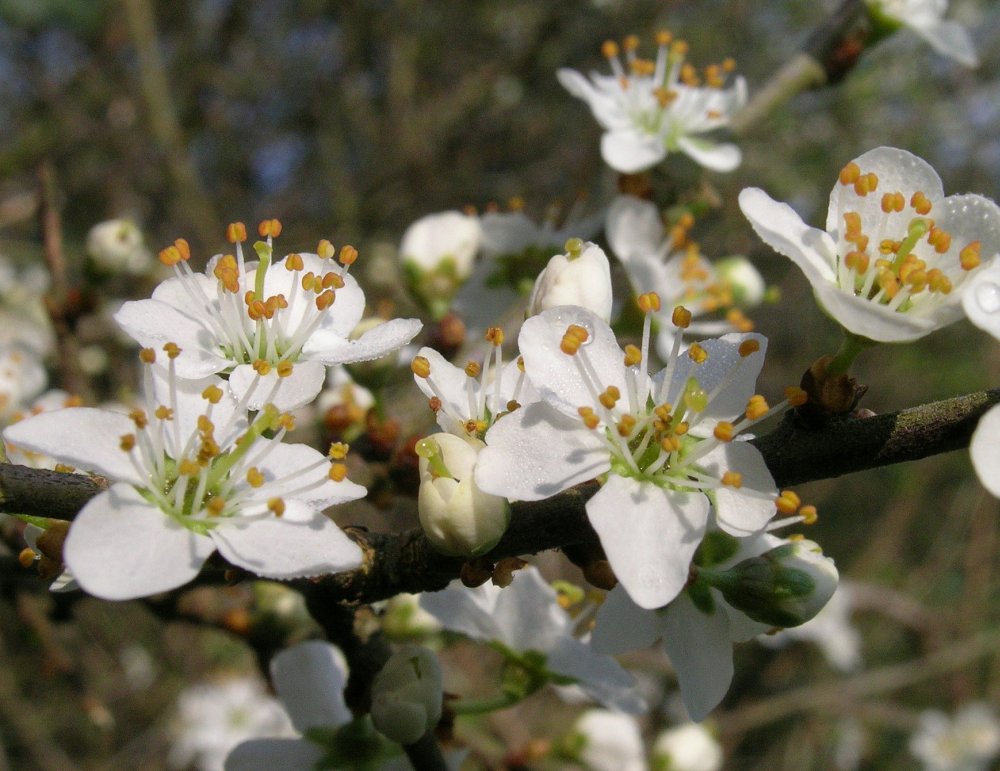
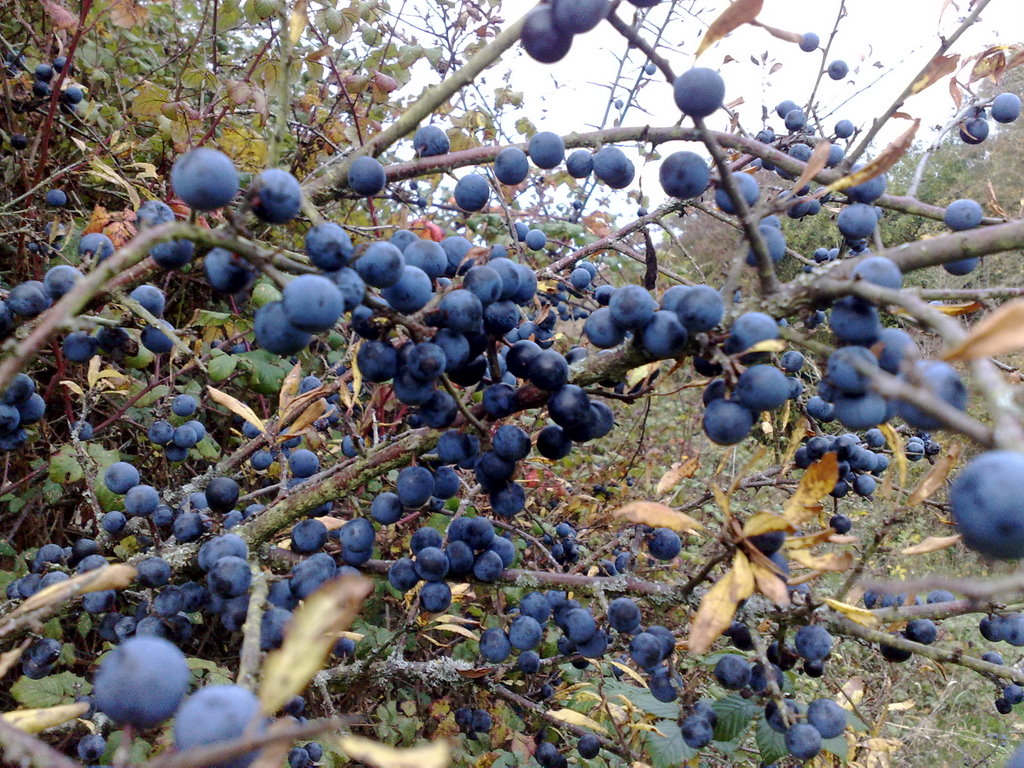
Prunus spinosa (photo Rob Wolton www.hedgelink.org.uk)

Many deciduous hedge plants, such as Crataegus monogyna (hawthorn) and Prunus spinosa (blackthorn), flower and fruit from the previous year’s growth.  Hence, if you want a good crop of berries you should prune alternate sides each year.  Ideally, wait until after the birds have eaten most of the berries – typically, around now.  I think its best to prune a few centimeters above the previous year’s growth, to encourage vigorous fruiting, and then cut back more severely every few years.

Try to achieve a slight taper from bottom to top, as this allows more light to reach the base of the hedge, and helps prevent gaps at the bottom.  If its a formal hedge it’s worth using a taut string as a guide, to ensure the top is absolutely flat and level.  Formal evergreens – Taxus baccata (yew) and Buxus sempervirens (box)  – are best lightly trimmed two or three times in mid and late summer (nesting birds permitting).  Don’t forget to remove the trimmings, to minimise the potential for disease.

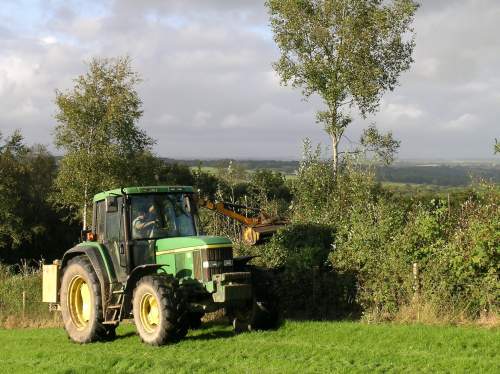
Remember that confiers won’t regrow from old wood, so don’t be overenthusiastic with the hedge trimmer if you don’t want brown patches.  I was once told that if you trim conifers in November or February you can get away with cutting into old wood, but I’ve never put it to the test. (Let me know if you try it and it works, but don’t blame me if it doesn’t!)   Best to keep fast growing conifers well under control from the outset.  I have to confess that we inherited our towering leylandii with the house, and it’s larger than I can reach with a long reach trimmer and step ladder: today involved bribing a chap in a huge John Deere tractor with £20 and a bottle of wine, which was a much better deal than two days of hard graft with the petrol trimmer :-) .

forget the petrol hedge trimmer....... (photo: Rob Wolton www.hedgelink.org.uk)


Posted in Fruit, Garden Design, Garden Maintenance, Landscape Design | Tagged , , , | 1 Comment

Planting for Winter Interest

The recent early snow is perhaps a good cue to think about the garden’s appearance in winter. It is a common mistake to asume that, once the first frosts come, visual interest in the garden is over until next spring. Winter interest doesn’t just come from flowers (of which there are admittedly rather few) and foliage, but also from attractive stem colouration, dessicated seed heads, and the like.

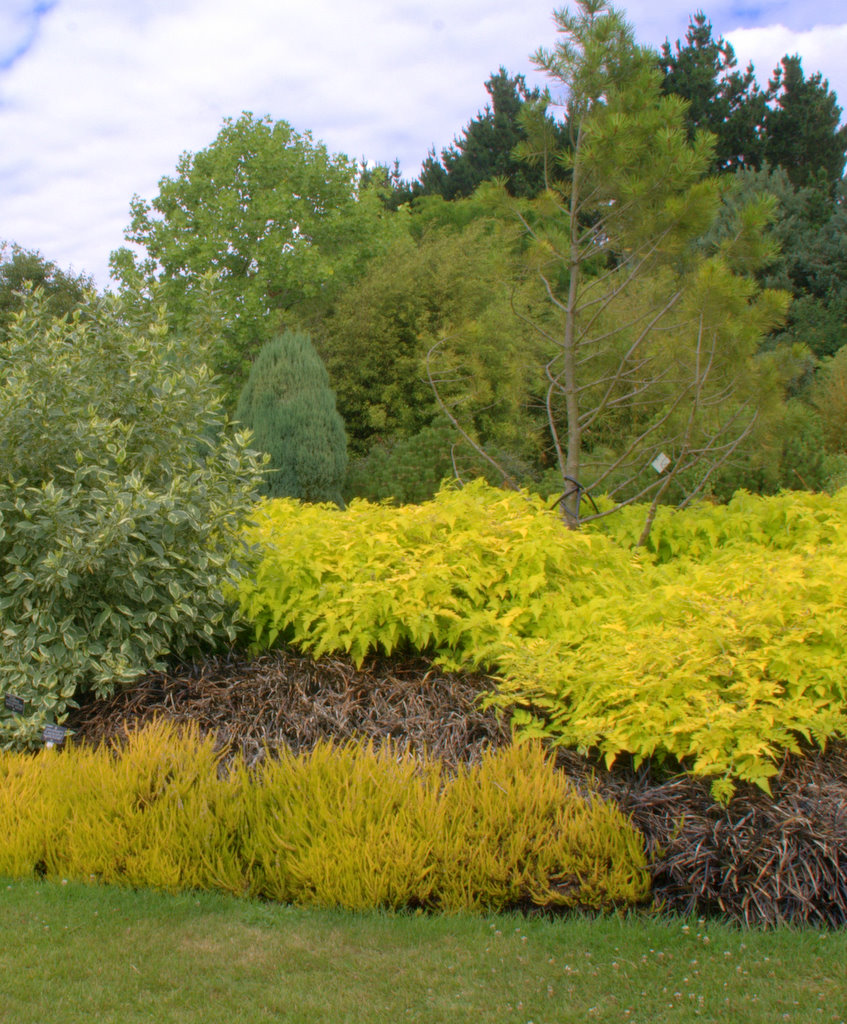
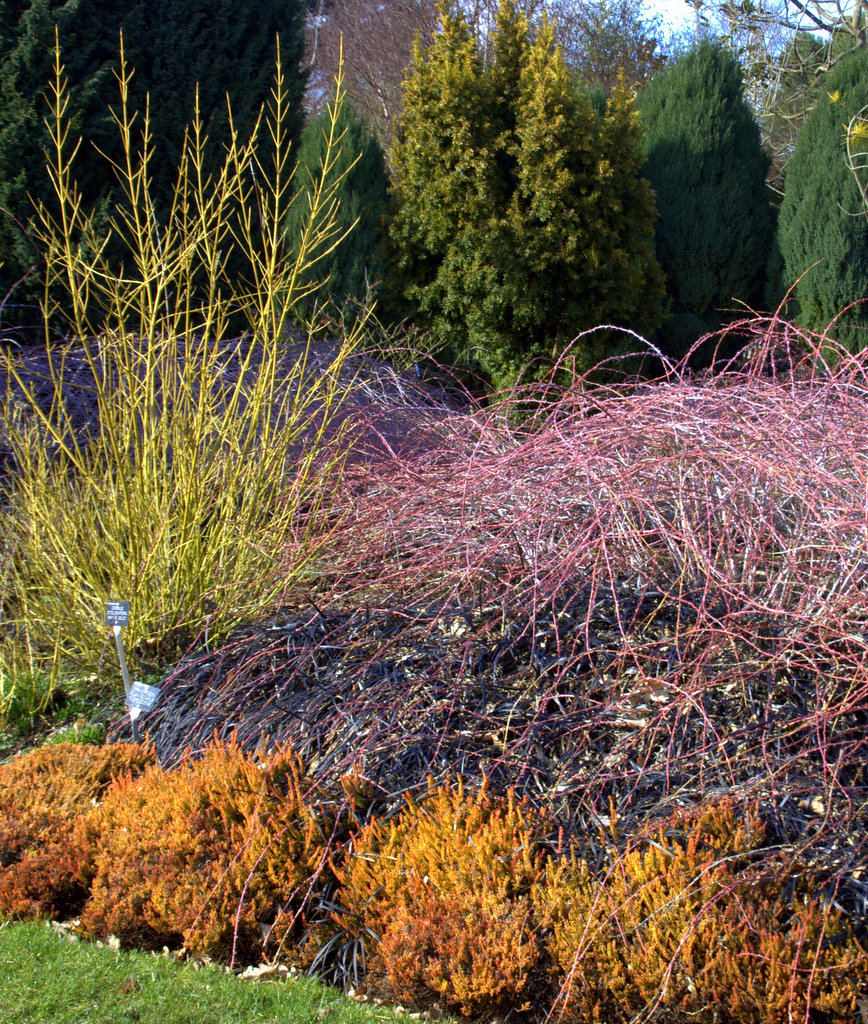
In summer this border is dominated by the bright yellow-green foliage of the Rubus cockburnianus “Golden Vale” and the variegated Cornus sericea “White Gold”, but it makes its biggest impression in winter, when the contrasting colours are quite striking.

Sir Harold Hillier Garden, Romsey

Cornus sericea “White Gold”, Rubus cockburnianus “Golden Vale”, Ophiopogon planiscapus “Nigrescens”, and Calluna vulgaris “Robert Chapman”.

Sir Harold Hillier Garden, Romsey

Vivid stem colouration provides great contrast even in winter


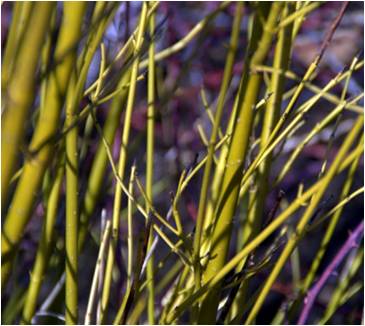
Bright green stems and variegated summer foliage

Cornus sericea

Cornus sericea (previously C.stolonifera) “White Gold” is a hardy suckering shrub with bright green stems from leaf-fall through until they are pruned in March.
The ‘White Gold’ form has excellent white-edged variegated foliage, and therefore makes a good dual season plant. The foliage colour and effect is also enhanced by a hard pruning regime.


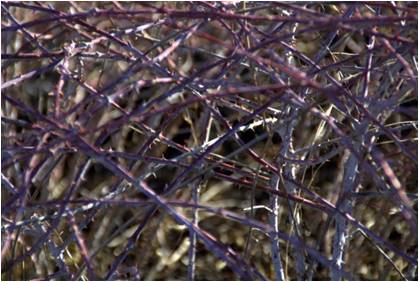
Purple stems with a white bloom, in winter

Rubus cockburnianus

Rubus cockburnianus “Golden Vale” is a handsome and prickly briar with bright golden leaves all summer and in winter, dazzling, chalky white arching stems. The lovely golden yellow foliage makes this an eye-catching ornamental plant in the summer and the white stems give fantastic winter interest.


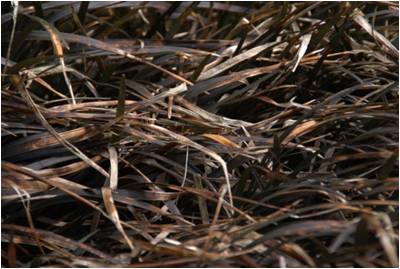
Striking bronze-black foliage

Ophiopogon planiscapus

Ophiopogon planiscapus “Nigrescens” is an evergreen perennial with tufts of glistening strap-like leaves that are closer to black than almost any other plant. The small white or lilac flowers are followed by dark green berries. Makes an excellent foil for contrasting flowers and foliage.


A variant of scotch heather

Calluna vulgaris

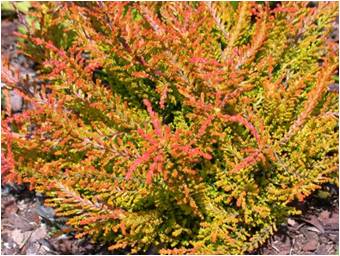
Calluna vulgaris “Robert Chapman” Densely formed low-growing evergreen – a spreading variant of our native Scotch heather. Foliage is golden in spring, turning to orange, then red in winter, with tiny purple flowers in late summer and autumn.


This is just one example, from the Sir Harold Hillier Garden near Romsey, Hampshire, which illustrates how it is possible to achieve year-round interest. There are lots of other plants you could consider, and don’t forget that plants like sedums and Lunaria (Honesty) – with their interesting seedheads that survive all winter – are also really useful.

Posted in Garden Design, Landscape Design, Planting | Tagged , , , , , , | 5 Comments

Soil Structure – and the importance of preserving it!

There are plenty of reasons why homebuilders and renovators should pay attention to garden design, even before they start building work, but one keeps nagging at me – preserving the soil structure during construction.

We’ve all seen the quagmire that a building site can become, especially during a wet winter.  What isn’t so obvious, at least to the casual observer, is the damage that is being done to the underlying soil structure.

But what is soil structure?  Soil consists of mineral particles, from microscopic clay particles to sand and stones.  “Soil structure” describes the solid soil material and the continuity of spaces (pores) between the particles.   Soil pores are vital for drainage, aeration and the growth of plant roots, and its here where soil organisms – bacteria, fungi, insects earthworms and beetles – live.  A good soil structure is crumbly, and allows roots to penetrate, whist retaining water just long enough for plants to access it.  (If you want to know more about soils, British Sugar have some useful guides which you can download here.)  Simply put, plants won’t grow in soil with a poor structure.

The big risk during construction is compaction (and smearing) due to vehicle traffic – lorries making deliveries, diggers and dumper-trucks.  How a soil reacts to these loads depends on several things, but water content is the critical factor: a hard, dry soil  may just crack, but if it is too wet (soft and plastic when handled), soil compaction is inevitable.  Compaction is where the soil particles are squeezed together, eliminating pores and forming a  layer that is impregnable to water, roots, and air.  Compaction doesn’t just affect topsoil, it can also occur in a deeper subsoil layer.  The depth is further increased if fresh topsoil is brought onto site, once a house is completed, burying tyre ruts and left-over rubble.

Evidence of soil compaction comes much later, after the garden is planted – persistent wet spots and waterlogging, where plants just won’t thrive.  A trial pit will most likely reveal a grey or black anaerobic layer – perhaps only a few centimeters thick, and anywhere up to 60 cm below the surface.

So what can you do , if you suspect the soil is compacted?  Restoring a compacted subsoil is problematic: the compacted layer may be deep below the surface – deeper than regular cultivation will reach.  Plant roots won’t break up compaction this deep, so mechanical intervention is called for.

Typical agricultural subsoiler

Farmers use a “subsoiler”, towed behind a powerful tractor, to break up the compacted layer.  (Note, this is quite different from a mole plough, which creates a drainage channel.)  However, to be effective, sub-soiling must be carried out when the soil moisture content is just right: too dry and the soil stays in big chunks, too wet and it just creates more compaction.  And remember it’s the moisture content at the right depth that counts, not just on the surface.  The right conditions and implement depth can only really be established by trial and error.  Even if you can find a landscaper with the equipment and expertise, it may not be feasible to use a tractor in the confined spaces of a garden, especially when there are underground drains, electrical cables etc. to be avoided.  Then you really are stuck!

So the best solution is to avoid compaction in the first place.  How?  Well here are some key pointers:

  • Avoid using machinery in wet conditions.
  • Confine all vehicle and personnel traffic to areas that will form the drive and parking areas, and away from future planted areas of the garden (ideally, build the driveway early, to provide access).  If this isn’t possible, consider using temporary roadway.
  • Don’t handle soils when they are wet or plastic.
  • Don’t stockpile soils inappropriately – ideally keep piles below 1m high.

Obviously, to be sure you don’t risk causing soil compaction in areas that will subsequently be planted, you need to have a fairly detailed garden plan.

Posted in Construction, Garden Design, Landscape Design, Soil, Soil type | Tagged , , , , , | 2 Comments

Autumn Planting

I guess its about time I wrote something about gardening, so here goes.

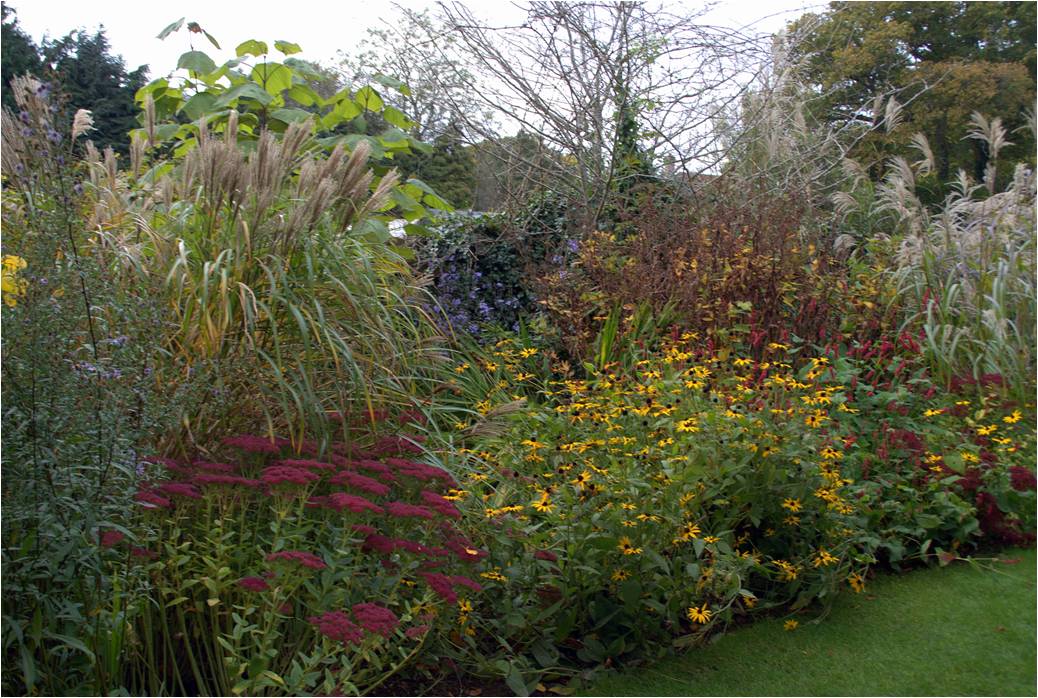
With autumn colours spreading through woodlands, and some trees and shrubs already loosing their leaves, you might be forgiven for thinking there’s not much interest left in the garden.  But it shouldn’t be the case.  In fact autumn (September to November) can be one of the best seasons for garden interest.  I snapped this picture at the Knoll Gardens near Wimborne, Dorset, in mid October.

Knoll Gardens, Wimborne

Vibrant reds of Persicaria  amplexicaulis “Taurus” and Sedum “Herbstfreude”, and yellow Rudbeckia  fulgida “Deamii”, with more subtle hints of lilac Aster laevis “Calliope”, make this autumn planting as lively as any summer border.  Architectural grass, Miscanthus sinensis “Malpartus”, which blooms in early September, helps to give structure.

Rudbeckia fulgida Dreamii

Sedum Herbstfreude

Rudbeckia  fulgida “Deamii” produces bright yellow flowers from August to October, and works particularly well in bold drifts.  This one grows to around waist – chest height, although others are taller.

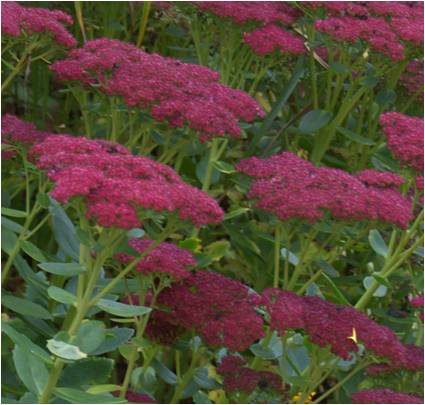
The succulent leuttice-green leaves of Sedum “Herbstfreude” are topped with salmon-pink flower-heads in summer that mature to pinkish-bronze, then coppery-red, in autumn. The dried flower heads continue to provide structure and colour through winter, too.

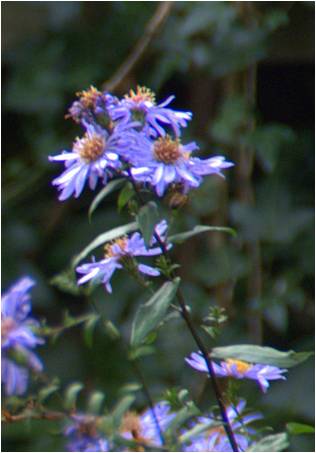
Although it was perhaps past its best when I took these photos, Aster laevis “Calliope”  is a bushy, clump-forming  perennial with dark green leaves and characteristic purple-black stems, producing pale lilac-blue flowers from late summer to mid-autumn.

Aster laevis Calliope

Persicaria amplexicaulis Taurus

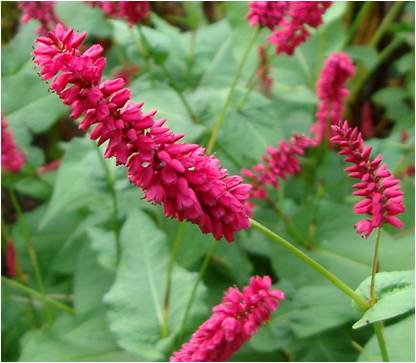
Persicaria amplexicaulis is one of my favourites.  “Taurus” produces long tapers clustered with tiny, fluffy, deep crimson flowers from mid summer until the first frosts. This vigorous perennial has handsome foliage and quickly makes dense groundcover. Planted in bold swathes, it adds vertical interest in the border right through till late autumn.  Persicaria really needs moist soil, and all these plants will tolerate partial shade.

Knoll Gardens are particularly good in Autumn, and well worth a visit for some inspiration.  They also have a garden centre where you can buy many of the plants seen in the gardens.  Ornamental grasses are a particular speciality.

Posted in Garden Design, Landscape Design, Planting | Tagged , , , , , , | Comments Off

Nature’s Autumn Harvest

I was planning to write about planting for autumn interest, but I got distracted while walking the dog – I just picked a whole bag of sloes.  I find it curious that there are such copious quantities of sloes still on the bushes beside a well-used footpath – it used to be quite hard to find any: has sloe gin gone out of fashion?  Well, maybe.  It was a Daily Telegraph article by the late Sir Clement Freud, some 15 years ago, that first prompted me to make my own sloe gin.  More recently he wrote something similar for the Racing Post Sir Clement Freud: RIP sloe gin, the drink of my youth.(Sports).

Ingredients:
1 litre gin – Plymouth gin, ideally, and try to get hold of the duty free stuff – its got more alcohol :-)
500g sloes (that’s the fruit of the blackthorn, Prunus spinosa, just in case you weren’t sure)
250g caster sugar

Preparation:

  1. Prick the sloes with a needle, or cut the skin with a knife.
  2. Drink half the gin.
  3. Combine the sloes, sugar, and remaining gin in a wide-necked preserving jar (“Kilner Jar“), and give it a shake to start the sugar dissolving.
  4. Wait for 3 months (agitate gently from time to time), and then decant and drink (or bottle).  Whilst its maturing you can taste, and add extra sugar, if you wish.  (Tip: after decanting the gin, pour sherry over the sloes, and leave for a short while – makes an interesting tipple.)

It’s important not to reverse steps 1 and 2.  Best not to pick sloes before October (ideally wait until the first frost); any later than early November and it won’t be ready by Christmas.  And don’t leave the fruit in the gin for more than 6 months maximum – it starts to taste a bit “off”.  Don’t take any notice of stories about putting sloes in the freezer – the first frost thing is all about how ripe they are, so freezing won’t help.  Make a note of the gin/sloes/sugar ratio on each bottle.  That way you can adjust the recipe to suit your own preference.  Sloe gin goes well after a big meal, or in a hip flask on a wintery day – especially if you’re into hunting or shooting!

Sloe berries - Prunus spinosa

If you can find a wild damson tree, damson gin is made in a similar way – and is delicious.  We found lots of damsons during our narrow boat holiday on the Oxford Canal last September, but the only one I know near home is on private land and it’s purely out of a sense of social responsibility that I ….er…… save the fruit from rotting on the tree ;-) .


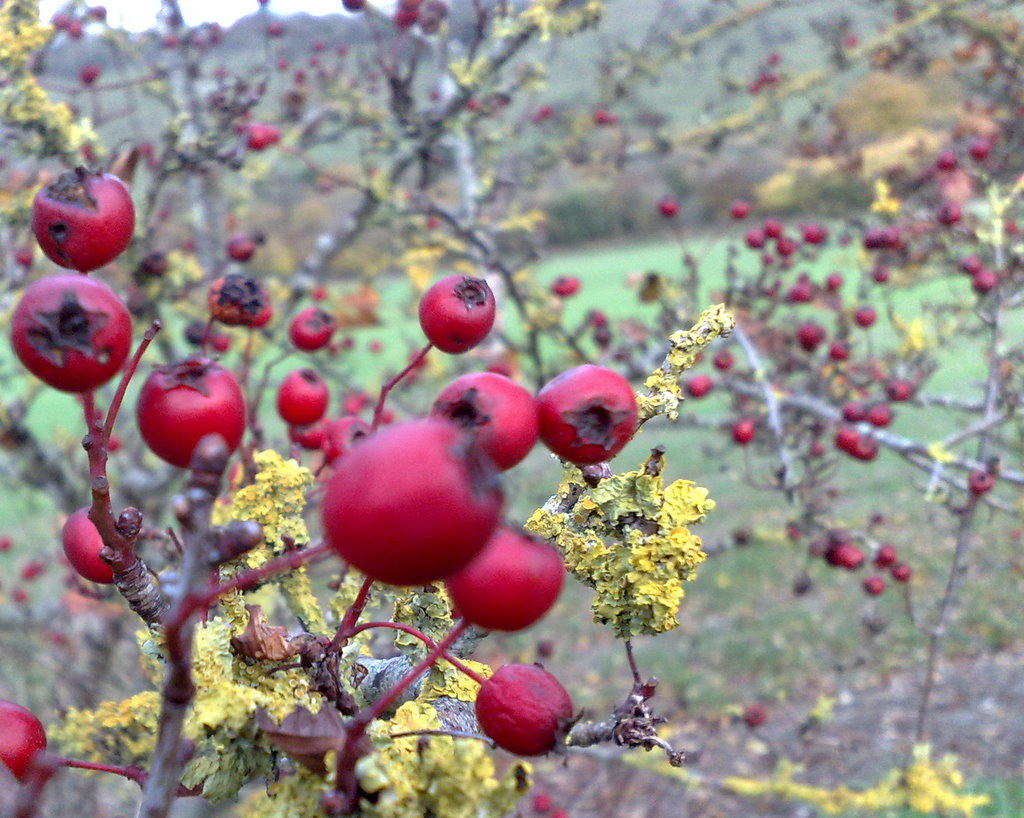
Haws (Hawthorn berries) - Crataegus monogyna

There are lots of hawthorn berries (haws) on the hedges too, and now’s about the time to pick them.  These can be made into a jelly, which goes well with meats etc..  As with all wild fruits, it pays to taste the fruit before you pick, to make sure they have a good flavour.  You may need to experiment a bit to get the best results, but there is a recipe here on the Eat Weeds blog.  As the blog name suggests, there’s lots of other interesting stuff about foraging there.

Have fun…. and Cheers!

Posted in Fruit, Landscape Design, Planting | Tagged , , , , , , , , | Comments Off

Sculpture in the Garden

I’m hoping to be able to attend Jilly Sutton’s forthcoming masterclass at the Oxford College of Garden Design, on the 11th November.  The OCGD masterclasses are great opportunities to hear first-hand from internationally renown experts, and attendance is not just limited to current students and alumni.  Last year I was disappointed to miss the legendary John Brookes, but Duncan Heather did post an excerpt on his blog – it’s well worth a look.

The Architect - Jilly Sutton

I’m particularly looking forward to this one.  I feel Jilly’s work has a kind of softness in it’s beauty which is rarely found in contemporary sculpture: she usually works in wood, and many of her subjects are faces – with soft, gentle features.  It takes a rare skill to bring out the natural lines of wood grain and combine it with the subject so successfully.


Posted in Art, Garden Design, Garden Sculpture, Landscape Design | Tagged , , , , | Comments Off

Plants Make You Feel Better

Whilst readers of this blog may be happy to accept, without “proof”, that plants improve how you feel, many others remain sceptical.  But there is actually a fair bit of sound scientific evidence to support the link between having plants around you and being less stressed and more productive. 

As long ago as 1998 Dr Tove Fjeld et al. published a paper “The Effect of Indoor Foliage Plants on Health and Discomfort Symptoms among Office Workers” which found, amongst other things, that complaints of coughs/sore throats and fatigue were reduced by 37% and 30%, respectively, in offices that contained plants.

Prof. Virginia Lohr, working at Washington State University,  investigated the effect of plants on workers in windowless offices, and found plants improved productivity (12% quicker reaction time) and reduced stress (lower blood pressure), whilst participants reported feeling more attentive, too.  (She’s also done some interesting work on how people respond to different tree shapes – I might write something about that in a later post.) 

There is now so much evidence for the beneficial effect of indoor plants that the Flower Council of Holland has established a program called Plants for People, and you can register for their e-newsletter here. (Lots of research papers and other info is downloadable from here.)

So, if you don’t have any plants to keep you company in your office during the coming winter months, then you’d better do somethig about it!

Posted in Architecture, Planting | Tagged , | Comments Off

Free Tickets Link for Southwest Homebuilding & Renovating Show 2010

We’re exhibiting at the South-West Homebuilding & Renovating Show 2010 on 27-28 November 2010 – see our earlier post.

If you would like FREE tickets to the show (normally £5 in advance and £8 on the door), just click on the button below.  We’re on stand 504 (on the balcony) – see you there!

Homebuilding & Renovating Show Somerset 2010; click here for FREE tickets

Posted in Garden Design, Landscape Design | Tagged , | 1 Comment

Growing Grapes in Hampshire

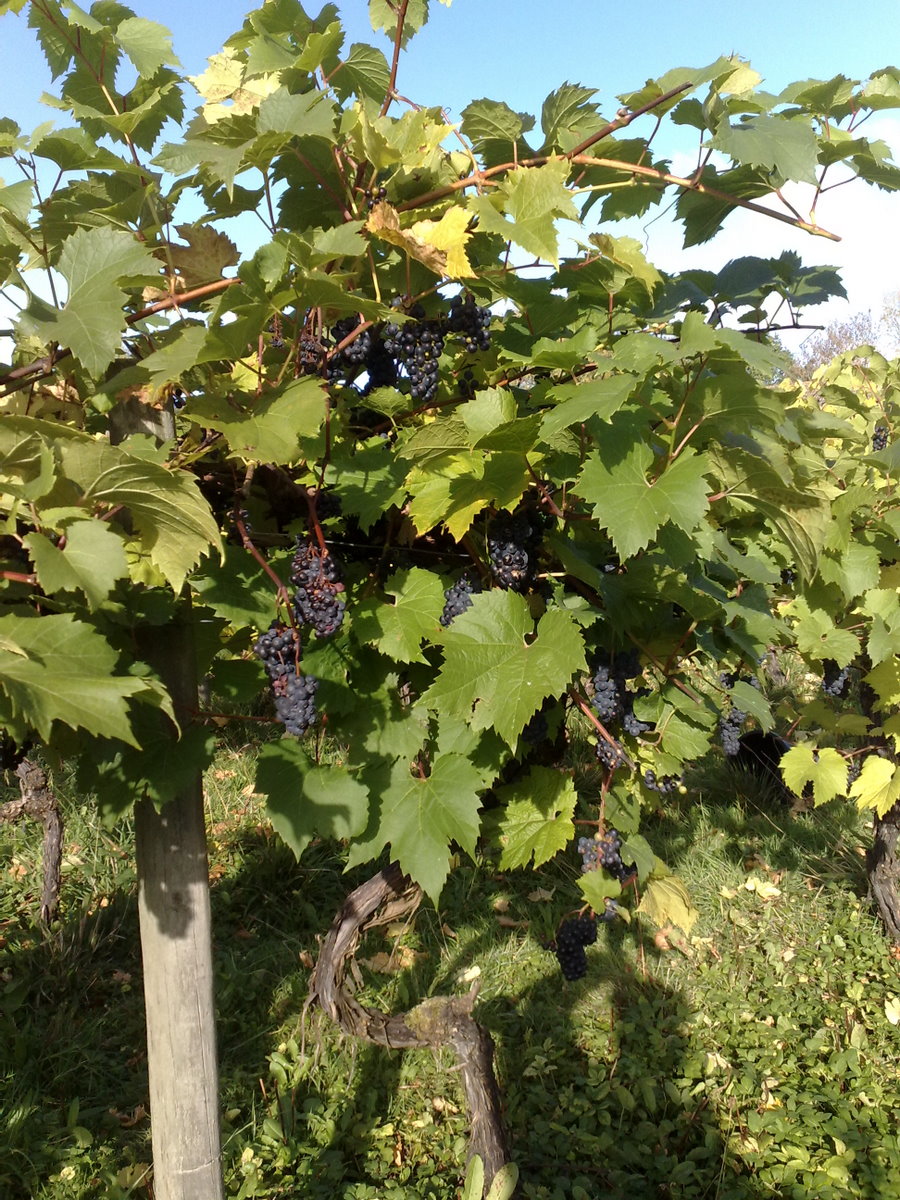
Over the years Judy’s brother Tim has been involved in most aspects of wine production, and he retains an interest in a small vineyard of a few acres in west Hampshire.  Yesterday was “grape picking day” and I, along with about 20 other family and friends, assembled to harvest an excellent crop.

This end row is perhaps a little too prolific (too much foliage inhibits ventilation and increases the risk of botrytis), but an excellent crop nevertheless.

The vines are now about 30 years old, and the quality has improved considerably over recent years, to the point where last year’s harvest was the first supplied to one of the most prestigious local vineyards, whose wines grace the shelves of Waitrose.  (Quite what this means for us pickers I’m not sure – we used to be “paid” with a share of the wine, but I doubt that’s realistic with bottles retailing at between £7 – £15 a bottle!)  In the recent past grapes have been supplied to Rosemary Vineyard, on the Isle of Wight, who even made a wine named after “our” vineyard a few years ago.

In case you are thinking of planting some vines yourself, it’s important to be realistic about the economic reality.  Winemaking involves considerable investment, and is only viable if sufficient grape production is available – probably at least 20 acres.  Hence, most smaller producers sell their grapes.

Input costs (sprays, mainly) are typically around 25% of the crop value.  But – and here is the rub – if yesterday’s picking team of family and friends had been paid for their efforts, the crop would have barely broken even.  And that doesn’t begin to take account of capital costs.

If that hasn’t put you off, we’re well placed to advise on establishing a vineyard.  Or how about planting a few old fashioned eating varieties – they’re far superior to the modern tough-skinned seedless ones sold in supermarkets?  In fact a few rows of vines can be very useful to the landscape designer on larger projects, especially if there is an old walled garden, as they greatly assist the smooth transition from garden to surrounding arable farmland.

Posted in Garden Design, Landscape Design, Planting | Tagged , , , , , | Comments Off

Right tree, wrong location?

I thought I would share some thoughts prompted by a row of oak trees (Quercus robur) that I often pass whilst walking the dog.  This particular row of trees comprises some fine specimens, but also several rather poor examples, and a couple that look decidedly sick.  So why the differences?

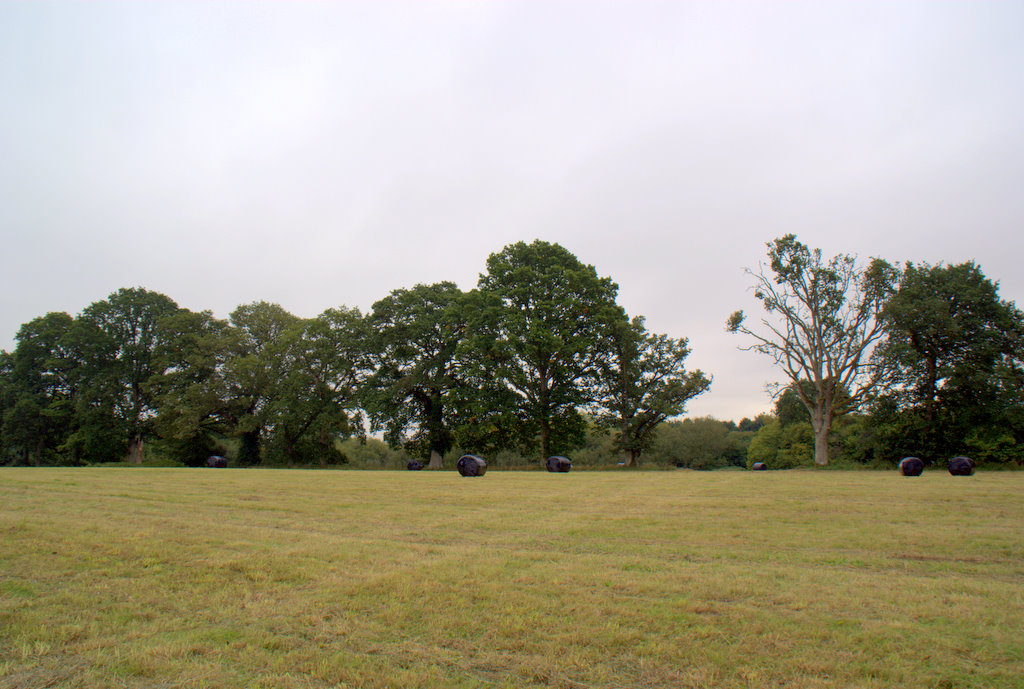
Line of English Oaks at Rectory Farm, Alderbury, Wilts.: note the two poor trees either side of a former gateway, at the right hand end.

The poorest trees are either side of a gap, which the farmer confirms used to be a gateway, so my first thought was that soil compaction (or even a diesel spill) might be to blame.  But, on closer inspection, both trees – which are clearly of different age – have very short main stems, with multiple main branches from only 1.5 – 2 metres height.  In fact several of the trees exhibit this poor growth habit whilst, in contrast, others are much taller, with strong vertical main trunks and excellent overall form. Curiously, many of the trees are quite old – I estimate they range from 80 to >200 years – so whatever is causing the poor habit certainly isn’t killing the trees.

These fields are not recent: the field pattern is characteristic of ancient countryside, and the fields may have been formed by “assarting” – the clearing of a patch of woodland to form a field leaving a narrow strip of the wood as a shaw or shelter belt between the new field and the existing fields: over the years this strip would be nibbled away by ploughing etc., but would continue to reflect the original woodland flora.  Hence our line of oaks.

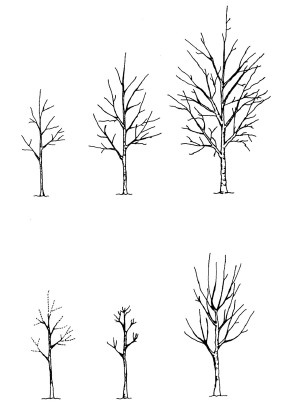
Then I remembered that our village has at least 7 different soil types, including loam, chalk, clay, free-draining sand and gravel; in geological terms it is a landslipped terrain of “London Clays” and “Reading Beds”, overlaid by “Bagshot Beds”.   Even walking across a single field you can go from well drained red loam to boggy black peaty soil, to yellow sand.  And therein lies what I think is the explanation – below a thin topsoil there is variously sand or clay.  As the young oak trees tried to establish, some found an ideal moisture-retentive clay soil, whilst others sent their roots into free-draining sand, and consequently suffered recurrent summer droughts.  Particularly during early life, a drought period would cause a tree to suffer tip die-back on the trunk and branches.  When wet weather returns several new shoots often emerge from the living tissue behind the dead tips, and these shoots become equally dominant with the main trunk.  The result is a weak, inferior structured tree.

A tree of high quality that receives adequate water during establishment (Top) develops good structure, while trees that suffer drought (Bottom) die back and can develop multiple trunks or other types of poor form.

So, aside from demonstrating the adaptability of Quercus robur,  perhaps this line of trees is a rather nice illustration of the importance of matching plants to soil conditions. ……  Well, that’s my theory.  If anyone has any alternative suggestions please do leave a comment.

Posted in Arboriculture, Planting, Soil type | Tagged , , , | Comments Off